The PHP Continents Package provides a convenient and object-oriented approach to working with continent data. Designed to integrate continent information into any PHP applications with ease. This package offers easy access to continent names, non-standardized alpha-2 codes and UN M.49 numeric codes. Eventually, more detailed geographical data is coming like subregions and extra locales.
Features
Easy retrieval of continent names and codes.
Object-Oriented Programming (OOP) approach for better data management and integration.
Lightweight and simple to integrate into any PHP project. (8.1+)
Currently supporting English, Hungarian, German, Spanish, Italian and French languages.
Future support for subregions and multiple locales, making it versatile for international applications.
Installation
The PHP Continents Package can be easily installed via Composer.
composer require omisai/php-continents
Usage
After installing the package, you can begin to work with continent data. You can work with any continent model or access all of them through a Collection.
/** * Access through the Collection * * Consider using the Collection class, if you * plan to register it to a service container. * It eagerly loads all the continents. */useOmisai\Continents\Collection;
$collection = newCollection();
$continents = $collection->getContinents();
/** * Shorthand to use the default english locale */$continents[0]->name; // "Asia"/** * Or using different locale */$continents[0]->getName('fr'); // "Asie"/** * Search for continent based on alpha-2 code */$collection->getContinentByCode('OC'); // Omisai\Continents\Models\Oceania/** * Search for continent based on UN M.49 numeric code */$collection->getContinentByNumeric('010'); // Omisai\Continents\Models\Antarctica/** * Use any continent directly */useOmisai\Continents\Models\Europe;
$europe = newEurope();
$europe->numeric; // "150"$europe->code; // "EU"
Changelog
Please see CHANGELOG for more information on what has changed recently.
This is my setup for my own knowledge system in VSCode. Feel free to modify it as you wish.
Setup
Clone this repository.
Install recommended extensions. I originally used Foam, but found it to be optional (its features doesn’t really enhance my experience, as of v0.8). So, it’s entirely up to you!
Methodology
Your capturing system lives in the dump folder. This is where you store your “fleeting notes” – notes that you capture as the ideas pop into your head.
Your long-term notes live in the brain folder. This is where you create links and connections between notes and build your second brain 🙂
If you journal, you might find the journal folder useful to keep your brain clean
Other principles & considerations
Try to reduce the levels of folders that you have. Your notes should not be categorised into topics; rather, they should be linked together and searched through these links.
I use Git for document versioning and you can consider doing that too 🙂
Others have used Foam to publish these notes to the web (i.e. auto-deploy to GitHub Pages/Netlify/other platforms on git push). I’m not doing that here, as I prefer to keep my notes private.
@TODO I’ll flesh out this section more as I delve deeper into the Zettelkasten methodology!
Fun Stuff I Included (feel free to remove it)
style.css: Beautifies the Markdown Preview by highlighting H1 text with yellow. Change which CSS files to use for styling in settings.json
Code snippets
ctime: Gets the current time in HH:MM format
tags: Inserts a section that allows you to tag your note and link to other documents. Not necessary if you prefer inline linking/link-as-you-go
“Macros” for Daily/Weekly notes
This is specified in tasks.json
To run the macro:
Specify a default directory for the daily and weekly macros in settings.json
minima is a lightweight deep learning framewor, lean yet effective
tailor-made for educational exploration.
Just like a delicate sapling inspired by the towering strength of an
oak, Minima draws its inspiration from PyTorch.
Yet, it carves its own identity with a straightforward interface and a
curated set of features.
This makes learning and using it a breeze, allowing you to
effortlessly build and train neural networks.
Indeed, Minima is your friendly companion on the journey to
understanding deep learning, where less is often more.
Installing
You can install minima on your own machines with conda
This example defines a simple neural network with two linear layers and
two activation functions, trains it on a dataset using stochastic
gradient descent, and evaluates its accuracy on a test set.
Documentation
For more information on how to use minima, please refer to the
documentation, which can be found in the website above.
Contributing
coming soon!
License
minima is released under the Apache License 2.0. See LICENSE for more
information.
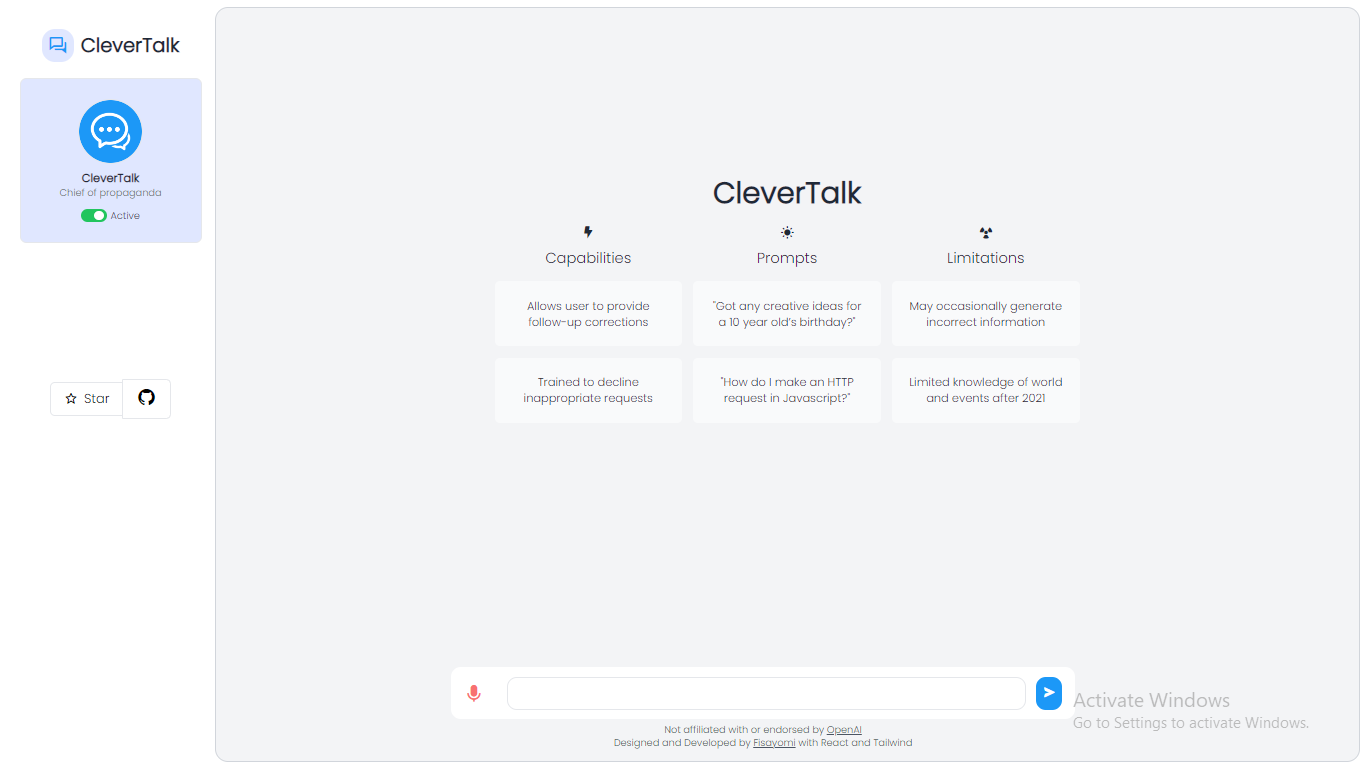
✨ CleverTalk is a chatbot 🤖 application that uses OpenAI’s GPT-3 API to generate responses to user inputs. This app is built using React.js for the frontend and Node.js for the backend, and styled using Tailwind CSS.
Clevertalk enables users to interact with a conversational AI powered by OpenAI’s GPT-3 API. The user can ask questions, make comments and the AI will respond with natural language.
The React front-end is built using Tailwind CSS for styling. The OpenAI GPT-3 API is used to generate natural language responses from the user’s input.
Clevertalk is an excellent way to learn more about conversational AI and explore the capabilities of OpenAI’s GPT-3 API. It is also a great way to have fun conversations with an AI.
When you first open the app, on the bottom of the page you’ll see a simple input field and a “Send” button. Type your message into the input field and click “Send” to send your message to the chatbot. The chatbot will generate a response based on your input and display it in the text area above the input field.
You can use CleverTalk to ask the chatbot questions, have a conversation, or just chat about anything you like. The chatbot’s responses are generated by OpenAI’s GPT-3 API, which is trained on a massive dataset of human language and can generate very human-like responses.
Contributing
If you’d like to contribute to CleverTalk, you can fork this repository and make your changes in a separate branch. Then, submit a pull request to have your changes reviewed and merged into the main branch.
This allows you to create a runnable tutorial by embedding special runnable
instructions (directives) in the markdown source, using the triple-backtick
markdown code block syntax. These code blocks will be executed at build time
and replaced with their output in the final markdown files.
Why?
Make sure the tutorial steps are up-to-date and working correctly with the
latest Ember, Ember CLI EmberData, etc.
Save time by not having to manually sync the content with upstream blueprint
changes!
Easy to maintain – changing a step early on in the tutorial automatically
propagates to later steps (in code snippets, etc).
A fantastic integration test suite for the Ember ecosystem!
The content of the source code block is the command(s) to run.
Commands can span multiple lines using \ at the end of each line to signal
line-continuation, as in:
```run:command
echo "This is a \
  command that \
  spans multiple \
  lines."
```
Multiple commands can be supplied. If any of them fails, it will fail the
build.
```run:command
npm run lint:hbs
npm run lint:js
npm run test
```
Lines starting with # and empty lines are ignored.
Options:
lang
The syntax highlight language to use in the resulting code block. Defaults
to shell.
hidden=true
Run the command(s), but omit the code block from the final markdown file
entirely.
cwd
Specify a CWD (relative to dist/code) for the command. This defaults to
. (i.e. dist/code), but most of the time you probably want to set it to
super-rentals (i.e. dist/code/super-rentals). Unfortunately, we cannot
just make that the default, because at the beginning of the tutorial, the
folder does not exists yet. (Generating the app is part of the tutorial.)
captureCommand=false
Run the command(s), but omit the command(s) themselves from the resulting
code block.
captureOutput=false
Run the command(s), but omit their output from the resulting code block.
run:file:create
Create a file.
Example:
```run:file:create lang=handlebars cwd=super-rentals filename=app/templates/index.hbs
<div class="jumbo">
  <div class="right tomster"></div>
  <h2>Welcome to Super Rentals!</h2>
  <p>We hope you find exactly what you're looking for in a place to stay.</p>
</div>
```
Result:
```handlebars { data-filename="app/templates/index.hbs" }
<div class="jumbo">
  <div class="right tomster"></div>
  <h2>Welcome to Super Rentals!</h2>
  <p>We hope you find exactly what you're looking for in a place to stay.</p>
</div>
```
The content of the source code block is used to populate the newly created
file. It is also rendered into the resulting code block. A trailing newline
will be added automatically, if it’s not already included in the source code
block.
Options:
lang
The syntax highlight language to use in the resulting code block.
hidden=true
Create the file, but omit the code block from the final markdown file
entirely.
cwd
Specify a CWD (relative to dist/code) for the filename. This defaults to
. (i.e. dist/code), but most of the time you probably want to set it to
super-rentals (i.e. dist/code/super-rentals). Otherwise, the resulting
code block will have its data-filename set to super-rentals/app/...,
which is probably not what you want. Unfortunately, we cannot just make that
the default, because at the beginning of the tutorial, the folder does not
exists yet. (Generating the app is part of the tutorial.)
filename (required)
The filename (the path relative to cwd) used for creating the file. Also
sets the data-filename metadata field in the resulting code block.
If the source is a file, then the source file’s content will be rendered into
the resulting code block. If the source is a folder, its structure will be
rendered into the resulting code block using a format similar to the Unix
tree command.
If the source code block is non-empty, its content will be rendered into the
resulting code block in place of the default output described above. This is
useful because the file you are copying is probably quite large, and you don’t
necessarily want to render the whole file into the resulting markdown file.
Options:
lang
The syntax highlight language to use in the resulting code block.
hidden=true
Copy the file, but omit the code block from the final markdown file entirely.
cwd
Specify a CWD (relative to dist/code) for the filename. This defaults to
. (i.e. dist/code), but most of the time you probably want to set it to
super-rentals (i.e. dist/code/super-rentals). Otherwise, the resulting
code block will have its data-filename set to super-rentals/app/...,
which is probably not what you want. Unfortunately, we cannot just make that
the default, because at the beginning of the tutorial, the folder does not
exists yet. (Generating the app is part of the tutorial.)
src (required)
The source filename (the path relative to dist/assets) used for creating
the file. Also sets the data-filename metadata field in the resulting code
block.
filename (required)
The filename (the path relative to cwd) used for creating the file. Also
sets the data-filename metadata field in the resulting code block.
The content of the source code block is the git patch to apply.
A patch can be generated by modifying a file, and running git diff -U.
It is often a good idea to ask git to include minimal context to make the patch
more resilient to changes in the blueprints. You can control the number of
context lines included in the diff by passing a number to -U, such as
git diff -U1. You can also manually edit and tweak the resulting patch to
keep a useful amount of context for the task at hand.
It appears that the diff ... header line as well as the index ... line, as
well as the “hunk context” (the text after the @@ ... @@) can be safely
omitted. The --- filename and +++ filename lines are required by git, but
can be omitted in the block; the directive will prepend them for you based on
the filename argument if they are not already included in the patch.
A good workflow for generating patches:
Insert run:pause at the appropriate spot
Make sure the file you are editing is clean or staged (git add file)
Make the changes
git diff -U1 > diff.patch, play with the context number, tweak the patch by
hand until you are happy with how it looks (keeping source-readability in
mind)
Undo the changes with git checkout file
Test the patch with git apply diff.patch
Even though the patch contains line numbers, those are only used as “hints”
when applying the diff. In practice, a well crafted patch could be quite
resilient. For instance, the patch given in the example has been verified to
apply cleanly even if the router blueprint has been changed to this:
As you can see, even though the line numbers have shifted around, git has no
trouble finding the relevant router map section from the above.
If the patch fails to apply cleanly, it will fail the build.
The resulting code block will contain the “combined” source of the file being
edited, with data-diff metadata field indicated the removed and added lines.
We can use this data on the client side to format the diff output. Potentially
we can render it using an interactive component that allows you to toggle
between the before/after/combined source, as well as folding away the unchanged
lines.
Options:
lang
The syntax highlight language to use in the resulting code block.
hidden=true
Edit the file, but omit the code block from the final markdown file entirely.
cwd
Specify a CWD (relative to dist/code) for the filename. This defaults to
. (i.e. dist/code), but most of the time you probably want to set it to
super-rentals (i.e. dist/code/super-rentals). Otherwise, the resulting
code block will have its data-filename set to super-rentals/app/...,
which is probably not what you want. Unfortunately, we cannot just make that
the default, because at the beginning of the tutorial, the folder does not
exists yet. (Generating the app is part of the tutorial.)
filename
The filename (the path relative to cwd) used for creating the file. Also
sets the data-filename metadata field in the resulting code block.
This is also used to format the patch before sending it to git apply, so
it is required unless they are already included in the patch and the block is
set to hidden.
```handlebars { data-filename="app/templates/index.hbs" }
<div class="jumbo">
  <div class="right tomster"></div>
  <h2>Welcome to Super Rentals!</h2>
  <p>We hope you find exactly what you're looking for in a place to stay.</p>
</div>
```
The content of the source code block is not used. If the source is a folder,
its structure will be rendered into the resulting code block using a format
similar to the Unix tree command.
Options:
lang
The syntax highlight language to use in the resulting code block.
cwd
Specify a CWD (relative to dist/code) for the filename. This defaults to
. (i.e. dist/code), but most of the time you probably want to set it to
super-rentals (i.e. dist/code/super-rentals). Otherwise, the resulting
code block will have its data-filename set to super-rentals/app/...,
which is probably not what you want. Unfortunately, we cannot just make that
the default, because at the beginning of the tutorial, the folder does not
exists yet. (Generating the app is part of the tutorial.)
filename (required)
The filename (the path relative to cwd) used for reading the file. Also
sets the data-filename metadata field in the resulting code block.
run:checkpoint
Indicates a checkpoint where the following steps are performed:
yarn test
Optionally, commit the current changes
Verify the git tree is clean (i.e. no dirty or untracked files)
This directive does not produce any output. If any of the steps failed, it will
fail the build.
Example:
```run:checkpoint cwd=super-rentals
Chapter 1
```
The content of the source code block is the git commit message.
To avoid failing the “clean tree” test, you should be adding any created or
modified files to the staging area as you go, using run:command hidden=true
code blocks.
cwd
Specify a CWD (relative to dist/code) for the command. This defaults to
. (i.e. dist/code), but most of the time you probably want to set it to
super-rentals (i.e. dist/code/super-rentals). Unfortunately, we cannot
just make that the default, because at the beginning of the tutorial, the
folder does not exists yet. (Generating the app is part of the tutorial.)
commit=false
Don’t create a git commit, but still run the other checks, including the
“clean tree” test. This is only useful if the chapter did not make any
changes at all, or one of the visible run:command blocks already committed
the changes as part of the tutorial flow.
run:ignore (or run:ignore:*)
Ignore the source code block, and omit it from the final markdown file
entirely.
This is useful for temporarily disabling a directive code block for debugging,
or because it is not working, while still keeping the code in the source file.
Essentially, this is how you “comment out” a directive code block.
For your convenience, you can pass any sub-directive after run:ignore:, or
pass any arguments to it. This allows you to just insert :ignore: into an
existing directive code block to disable it, without making any other changes.
Example:
```run:ignore:command cwd=super-rentals
# FIXME: don't run this for now, since Heroku is down atm
git push heroku main
```
run:pause
Pause the build until you are ready to resume.
This allows you to examine the state of things at a specific point in the
tutorial, which is useful for debugging, taking screenshots or generating
diff patches. Essentially, this is the this.pauseTest() for the tutorial.
Example:
```run:pause
Manually record a gif of performing the following steps:

...snip...
```
The content of the source code block will be printed to the command line
prompt. This directive does not produce any output.
run:server:start
Start a server (background task).
Example:
```run:server:start cwd=super-rentals expect="Serving on http://localhost:4200/"
npm start
```
The content of the source code block is the command for starting the server.
Unlike run:command, you can only pass a single command, thought the command
may span multiple lines if needed, using \ at the end of each line to signal
line-continuation.
Lines starting with # and empty lines are ignored.
All servers started with this directive must be explicitly shut down with the
run:server:stop directive before the end of the file, otherwise the build
will fail.
Options:
id
A unique identifier to reference this server process, which is needed when
shutting it down later. This is optional; by default, the command to start
the server is used as the id, but this allows you to specify a shorter name
if desired.
lang
The syntax highlight language to use in the resulting code block. Defaults
to shell.
hidden=true
Start the server, but omit the code block from the final markdown file
entirely.
cwd
Specify a CWD (relative to dist/code) for the command. This defaults to
. (i.e. dist/code), but most of the time you probably want to set it to
super-rentals (i.e. dist/code/super-rentals). Unfortunately, we cannot
just make that the default, because at the beginning of the tutorial, the
folder does not exists yet. (Generating the app is part of the tutorial.)
expect
Wait for a particular string to appear on STDOUT to ensure the server has
started successfully, before moving on to the next step.
timeout
Wait for some time to pass (specified in seconds) before moving on to the
next step.
If used in conjunction with the expect option, it will fail the step if the
checks are not completed before the deadline.
captureCommand=false
Omit the command used to start the server from the resulting code block.
captureOutput=false
Omit the output of the command used to start the server from the resulting
code block.
run:server:stop
Stop a server (background task) previously started with run:server:start.
Example:
```run:server:stop
npm start
```
The content of the source code block is the command used to start the server.
This directive does not produce any output.
Options:
id
A unique identifier to reference the server process (see run:server:start).
If this option is passed, the content block is ignored.
How?
Requires git
Probably only works on Unix/bash for now (PRs welcome)
Should probably run the build in a docker container anyway
yarn install
MAPBOX_ACCESS_TOKEN=your-token-here yarn build
Please note that you will need a Mapbox token in order to successfully run yarn build, otherwise the build will fail due to failing to load the map images. You can get your own token here. Once you have a token, you should assign it to the MAPBOX_ACCESS_TOKEN environment variable.
Processed markdown can be found in dist/markdown
The super-rentals code can be found in dist/code/super-rentals
Future Work
run:gif
Improve the build output
Extract this from super-rentals and make it usable for building arbitrary
runnable tutorials
This repo contains few apps/games developed in Streamlit.
Guessing Game
Project Location: apps/guess/main.py
This project takes a maximum number from the user. Then it chooses a random number between 1 and the given maximum number.
Now, it is the user’s turn to guess the selected random number. By each try, app would hint if its number is higher or lower.
One the number is guessed correctly, it would tell how many times it has been tried.
Tic-Tac-Toe (Offline)
Project Location: apps/tictactoe/main.py
This is a Tic-Tac-Toe 3×3 offline against the system.
Tic-Tac-Toe (Online)
Project Location: apps/tictactoe_online/main.py
This is a Tic-Tac-Toe 3×3 online against another online user. Each online user would select either X or O.
Message Board
Project Location: apps/chat/main.py
This is an online chat-box among online users.
Whiteboard (Online)
Project Location: apps/whiteboard/main.py
This is an online whiteboard base on the user’s session ID. We can also watch the other whiteboards live.
Demo
You can access the demo version deployed on Streamlit server at:
Should the state be merged at the same level as actions and getters?
You can directly call useOtherStore() inside of a getter or action.
~~Getter with params that act like computed properties ~~ Can be implement through a custom composable and passed directly to state.
Installation
yarn add react-mise
# or with npm
npm install react-mise
# or with pnpm
pnpm add react-mise
Usage
Install the plugin
No need for global object. you don’t need something like Provider like Redux or React hooks. it makes the application silly when you need to use multiple stores for 1 component.
Create a Store
You can create as many stores as you want, and they should each exist in different files:
import{defineStore}from"react-mise"// main is the name of the store. It is unique across your application// and will appear in devtoolsexportconstuseMainStore=defineStore("main",{// a function that returns a fresh statestate: ()=>({counter: 0,name: 'Eduardo',}),// optional gettersgetters: {// getters receive the state as first parameterdoubleCount: (state)=>state.counter*2,// use getters in other gettersdoubleCountPlusOne(): number{returnthis.doubleCount+1},},// optional actionsactions: {increment(){this.counter++},reset(){// `this` is the store instancethis.counter=0},},})
defineStore returns a function that has to be called to get access to the store (in component):


 https://github.com/omisai-tech/php-continents